
 ES
A cracked tile almost never means the hole saw was blunt. It usually means the tile moved, the bit skated, the heat built up, or the drill put load on the tile at the moment the bit broke through. All four are setup problems, and all four are cheaper to fix than a replacement tile.
Why tile cracks where it does
Porcelain and ceramic are strong in compression and weak in tension, and they are brittle at the glaze. A diamond hole saw does not shear the tile cleanly; it grinds a ring of material away, and the core that is left is pushed by the bit. That push is the load the tile has to survive.
The failure points are predictable. The tile cracks at the start if the bit skates across the glaze before biting, at the edge if the tile flexes while the bit is working, and at breakthrough if the exit face has nothing supporting it and the last millimetre of material blows out.
Support the tile where the bit exits
This is the single change that prevents most breakthrough cracks. Clamp or tape a sacrificial board — plywood or MDF works — directly behind the tile, tight against the back face and close to the hole position. The bit then exits into the board instead of into air, and the board absorbs the push.
Where the tile is already fixed to a wall, the substrate does part of that job, but only if there is no void behind the cut. Tap the area first. Drilling over a hollow patch of adhesive is a reliable way to crack a tile, because nothing resists the bit at the exit.
Start the hole without skating
On glazed tile the bit tends to skid before it bites, and the skid leaves a scratch that is often worse than the hole. Two ways to avoid it:
- Start the bit at roughly 45 degrees, with the machine running, and let it bite into the glaze. Once it has cut a small arc, straighten the bit up and continue.
- Use a template or a scrap piece with a pre-drilled hole, taped over the position, to hold the bit in place for the first few seconds.
Keep the first stage slow. The point of starting at an angle is to give the diamond a small contact area it can cut, not to force it through the glaze.
Cooling is what keeps the diamond cutting
Heat does two bad things at once: it glazes the diamond so the bit stops cutting, and it stresses the tile around the hole. On a horizontal surface, a ring of plumber's putty or a shallow dam around the hole, filled with water, gives continuous cooling. On a vertical surface, a spray bottle or a helper with a steady water supply is the usual answer, and the bit needs to be lifted out periodically to let water reach the cutting edge.
Dry drilling is possible on many tiles with the right bit, but it depends entirely on short passes and low speed so the rim does not overheat. If the bit stops cutting and the tile around the hole feels hot, you have already lost the edge and the tile is at risk. Water cooling technique is worth reading before a dry attempt; the same principles apply whether the machine is a drill or a grinder.
Speed, pressure and clearing the core
Diamond cuts on speed, not on force. Run the drill at low RPM and apply light, steady pressure — enough to keep the bit cutting, not enough to stall it. Leaning on the machine heats the rim, glazes the diamond and puts the tile under load.
Lift the bit out every few seconds to clear the core and let water in. On deep holes or hard porcelain, clearing frequently is faster overall than a continuous push, because a packed bit stops cutting and just generates heat.
Choosing between a hole saw, a core bit and a milling bit
Hole saws and core bits both cut a ring, and the difference is mostly scale and how the tool is driven. Small diameter holes in tile are usually handled by a diamond hole saw on a drill, with an M14 or plain shank depending on the machine. Larger diameters need a core bit with a stable, slower machine, because a large ring in a hand drill is hard to hold steady.
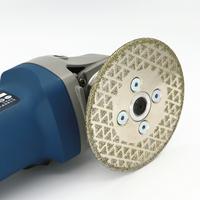
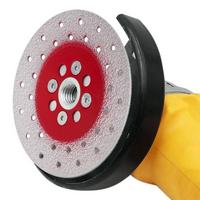
Where the hole needs to be opened up, repositioned, or cut for a non-round fitting, a diamond milling or cone bit grinds the hole to size rather than cutting a fixed diameter. That is a different operation from drilling and should be treated as such, because the side load on the tile is higher.
Regardless of type, the thread has to match the machine: M14 and 5/8-11 are not interchangeable, and a bit that is not seated properly will wobble and crack the tile.
Working order that holds up
Mark the position and confirm there is nothing behind it. Support the exit face with a board. Start at an angle or through a template. Keep water on the cut. Low speed, light pressure, and lift the bit often to clear. Ease off the pressure as the bit approaches breakthrough and let the last millimetre cut out slowly. Clean the hole and check the fitting before you move on.
Safety note: wear eye protection and a dust mask, and where drilling dry, use extraction and a suitable respirator. Keep water away from the tool's motor and use an RCD or GFCI protected supply when drilling wet. Follow the machine and bit manufacturer's instructions for the specific combination.
Most cracked tiles come from skipping the support board, forcing the bit through the glaze, or letting the rim run dry. All three are avoidable with a couple of minutes of setup.
Where to go next
The diamond drill bit category and the tile tools category cover the range by diameter and thread. For tile work specifically, the M14 sintered core bit and hole saw range and the vacuum brazed M14 core drill bit set are both aimed at drilling tile and stone, and a cased M14 hole saw kit is the usual choice when several diameters are needed on one job.
For the cooling side in more depth, the guide to water cooling for diamond core drilling goes further, and the notes on dry core drilling in granite and marble cover what changes when water is not an option.
If a specific tile, fitting and machine combination is proving difficult, send the tile type, the hole diameter and the machine, and the bit selection can be checked against the job.