
 ES
It happens on almost every job: a hole drilled slightly undersized, or a fitting that needs a few more millimetres than the hole allows. There is no going back once a hole is too small, but a cone diamond milling bit lets you open it up in a controlled way - widening the hole without breaking the tile or leaving a ragged edge.
Why a cone shape for enlarging
A cone or tapered diamond bit grinds a diagonal band of the hole wall at a time. Because the diameter increases along the cone, the operator can widen the hole gradually by working the bit deeper, taking off a little material per pass rather than cutting to a fixed size. That gradual control is the whole advantage: you creep up to the finished diameter instead of committing to it in one cut. A cone diamond milling bit is the tool for exactly this adjustment work.
Using a cone bit to open a hole
- Keep water flowing throughout - the wall of a hole heats fast and overheating cracks tile and burns the bit.
- Introduce the bit at an angle and work around the hole, keeping the cone centred so the opening stays round.
- Work in small increments: grind a little, check the fit, grind a little more.
- Keep the bit moving in a circular motion; dwelling on one side makes the hole oval.
- Watch the edge of the hole so the glaze or surface finish is not chipped by the side of the cone.
- Support the tile or stone from behind so the exit side does not spall.
Keeping the hole round and clean
Opening a hole evenly is about centring the bit and moving constantly. A bit that leans to one side removes more material there and leaves an oval, which then has to be corrected and is easier to over-do. Slow, even, circular passes keep the diameter consistent. If the material is brittle - glazed tile in particular - take the last millimetre very gently so the surface finish survives.
Matching the bit to the material
- Glazed ceramic: a fine diamond cone that grinds gently avoids chipping the glaze.
- Porcelain: a tougher bit and steady water, since porcelain is uniformly hard.
- Natural stone: a brazed or sintered cone handles the abrasive material and lasts longer.
- Glass: thin, fine bits, lots of water and a very light touch - glass cracks rather than deforms.
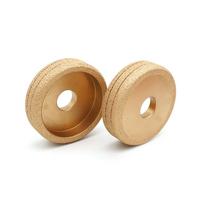
For irregular shapes rather than round holes, a drum wheel or finger bit gives more control than a cone. For shaping rather than enlarging, see our guide to diamond milling bits for porcelain and quartz.
When not to enlarge
If a hole is far too small, or the material is already cracked, enlarging may do more harm than good - a fitting that will not sit may be a sign the hole was drilled in the wrong place, and enlarging it just makes the error permanent. Check the fit and the layout before removing more material, and where a washer or escutcheon can cover a slightly oversized hole, that is often the safer fix than risking a crack.
Safety
Wear eye protection and a dust mask or respirator, use water to control dust and heat, and keep water away from electrical connections with an RCD or GFCI. Clamp or support the workpiece, keep hands clear of the spinning bit and respect the tool's speed. A bit that grabs in a hole can snatch the tool, so grip firmly and work at a controlled feed - follow the manufacturer's instructions for the bit and the material.
Cone bits in short
- A tapered bit opens a hole gradually and keeps it round.
- Keep it wet, keep it centred, creep up to the finished size.
- Support the exit side to stop spalling.
- Browse the diamond bit range for drilling and milling accessories.