
 ES
Chipping along the exit edge is the complaint that sends most tilers looking for a different blade, but the blade is only part of the story. Support, feed rate and cooling matter just as much, which is why the same blade can leave a clean cut on one job and a ragged edge on the next.
What actually causes chipping
Chipping is the tile breaking out where the blade exits, or where the unsupported material gives way. The usual causes are practical rather than mysterious:
- Blade flex. Side pressure bends a thin blade, so the rim lifts off the cut line and tears the glaze at the edge.
- Wrong rim for the material. A coarse turbo rim cuts fast but is rougher on a brittle ceramic face than a continuous rim.
- Poor support. If the tile is not fully supported on both sides of the cut, the unsupported half drops and chips as the blade leaves.
- Feeding too fast. Pushing the blade overloads the diamond and flexes the core.
- Dry cutting hard porcelain. Heat builds up fast and the bond can glaze, which raises the force needed to cut.
Blade choice for tile and ceramic
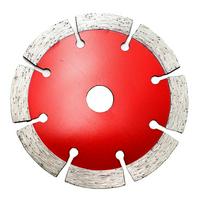
Rim type shapes the edge. A continuous rim puts more diamond in contact with the tile and cuts with less breakout, so it is the safer choice for a visible edge. A thin mesh or turbo rim cuts faster and generates less friction on hard porcelain, but it needs a steady hand to keep the edge clean. Ceramic is softer and more forgiving than porcelain; porcelain, being denser and harder, needs a finer diamond layer and more cooling to avoid chipping.
Technique that reduces chipping
- Cut from the finished face. On a glazed tile, cutting with the glaze facing up (or depending on the blade, down) keeps the visible face supported and reduces breakout on the top edge.
- Support both sides. A full bed of support under the whole tile stops the unsupported half dropping.
- Score first on delicate tiles. A light scoring pass before the full cut guides the blade and reduces edge lift.
- Light passes. Two gentle passes generate far less breakout than one forced pass.
Feed rate and pressure
Let the diamond abrade the tile rather than grinding it off by force. Forcing the blade flexes the thin core, tilts the rim and lifts it off the line, which is exactly the condition that chips an edge. A steady, unhurried feed keeps the rim flat in the cut and the diamond doing the work.
Water and cooling
Cooling keeps the bond sharp and the force needed to cut low. On porcelain, a small water feed or a wet-rated blade makes a visible difference to both speed and edge quality. If you cut dry, use a blade rated for dry use, take short passes and let it cool between them.
If the edge is already chipped
A few chips on a cut edge are usually repairable. Dressing a glazed blade restores its cut, and light polishing with a hand pad can blend a minor chip on stone or a through-body tile. Prevention is still cheaper than repair, so treat chipping as a setup problem first.
Safety
Tile cutting throws fine dust and sharp fragments. Wear eye protection and a dust mask, fit the guard, and clamp the tile so it cannot shift. Never exceed the blade's rated RPM, and follow the manufacturer's instructions for the tool and the blade. A damaged or bent disc should be replaced, not straightened.
For the wider selection logic behind these choices, see how to choose a diamond saw blade for porcelain tile cutting and the diamond tool troubleshooting guide. The most common blades for this work sit in the tile tools and diamond saw blade ranges, including a diamond blade for porcelain tile and ceramic. Pick the rim for the edge you want, support the tile properly, feed it slowly, and keep it cool - that combination cuts chipping more than any single change.