
 ES
Stone is a natural material, and the phrase "same colour" means something different in a quarry than it does in a specification. Two slabs cut from the same block, ten metres apart, can differ enough that a client rejects the installation.
Colour matching is therefore a planning problem before it is a repair problem. Handled at specification and layout, it is manageable. Handled after installation, it is expensive.
Why slabs differ
Variation comes from three sources: the block, the finish, and the moisture.
- Block variation. Mineral composition changes across a block, and different blocks of the same stone can be visibly different. This is why suppliers talk about batches.
- Finish variation. A polished surface and a honed surface of the same stone look different in colour, because the way light reflects changes. Two pieces at different gloss levels will read as two colours.
- Moisture. A damp stone reads darker than a dry one. On a recently installed floor, a patch that looks wrong may simply be wetter.
The second and third are often mistaken for the first. Before ordering a replacement for a "wrong colour" tile, confirm that the finish matches and that the piece is dry. A surprising number of colour complaints resolve when the floor dries.
Assessing a batch before installation
Lay the slabs out dry and look at them together in the light they will be seen in. Daylight from a window and warm interior lighting show different things, and a match that works in the workshop can fail on site.
Group the slabs by tone and vein direction before cutting. A layout that puts the darkest slab next to the lightest will show the variation; a layout that grades the transition will not. This is standard practice on large floors and it costs nothing but a decision made early.
Record the batch reference for every slab. When a replacement is needed in two years, the batch is the only way to get a close match, and suppliers rarely keep records of which batch went to which job.
Matching a replacement
A replacement piece has to match three things: tone, veining, and finish. Tone is the most obvious and the easiest to judge. Veining is harder, because a vein that runs the wrong way is more noticeable than a small tone difference. Finish is the one most often forgotten, and the one most likely to be wrong.
Take a sample of the original to the supplier rather than a photograph. Photographs are unreliable for colour, especially on a phone, and a screen cannot show the surface character. If a physical sample is impossible, ask for a photograph taken in daylight with a colour reference in the frame.
Accept that a perfect match may not exist. On a natural stone floor, a replacement that is visible but harmonious is a realistic outcome; a replacement that is invisible is luck. Set that expectation before the work starts, not after.
Blending a patch
Where a repair is unavoidable, placement matters. Put the replacement where the light is least raking and where it is least likely to be compared directly with the original. In a floor, that is usually away from windows and away from the main sightline.
Where several pieces have to be replaced, consider re-arranging rather than patching. Moving two original pieces into the visible area and putting the replacements where the furniture will sit is often better than trying to match in place.
Resin and filler matching
Small defects are often filled rather than replaced, and the filler has to match the stone in colour and in sheen. A filler that matches in colour but is glossier than the surrounding stone will catch light and show.
Mix small quantities and test on an offcut. Most resin fillers look darker while wet and lighten as they cure, so a mix that looks right in the pot dries too light; some stones also draw binder into the pores and shift the tone further. Let a test sample cure fully before comparing it, and judge the colour dry. Apply in thin layers and build up rather than filling in one pass, which avoids shrinkage depressions.
Finishing the repair
Whatever the repair, the finish has to match. A replacement piece that is polished to a different sheen than the surrounding floor will read as a different colour even if it came from the same block. Measure the surrounding finish and match it, rather than polishing to a nominal standard.
The measurement method is in gloss units on polished stone, and the difference between a honed and a polished surface is set out in honed vs polished marble. Both matter more on a repair than on new work, because the repair sits inside a field where any difference is compared directly.
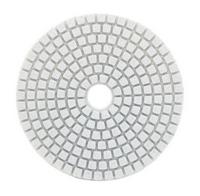
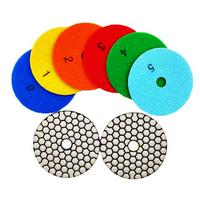
For the polishing pass itself, a 3-step hybrid polishing pad keeps the sequence short and reduces the risk of over-polishing a small area, and a dry diamond polishing pad is useful where water would be inconvenient, provided the speed is kept low.
Safety
Resin fillers and colourants are chemical products. Wear gloves and safety glasses, ventilate the area, and read the safety data sheet. Use residual current protection with a wet polisher, and keep solvent containers closed when not in use.