
 ES
Tapping a floor with a coin is one of the oldest tests in tiling, and it is still the fastest way to find a bond failure. A tile that sounds hollow is not fully bedded, and a tile that is not fully bedded will eventually crack, move, or come loose.
The question is not whether a hollow spot exists but how much of the tile is affected, whether it is growing, and whether the cause is still active.
Mapping the extent
Tap the whole floor in a grid, not just the suspect tile. Mark the hollow areas with tape and photograph them. A single hollow corner on one tile is a different problem from hollow centres across twenty tiles, and the pattern points at the cause.
- Hollow at the corners. Usually a bedding problem: the adhesive did not reach the corner, or the tile rocked while setting.
- Hollow in the centre. Usually a substrate problem: a high spot, or a tile laid over a dip with adhesive only at the edges.
- Hollow along a joint. Often a movement issue, or adhesive that was combed in one direction and never collapsed.
- Hollow in a line across the floor. Usually follows a substrate joint or a pipe chase.
Tap with something small and hard, and compare the sound to a tile that is known to be solid. The difference is obvious once the ear is calibrated.
Judging whether it matters
A small hollow at a corner, in a domestic floor, with no cracking and no movement, may never become a problem. A hollow over more than a third of a tile, in a commercial floor, is a failure waiting for a load.
Three factors decide the risk. The size of the hollow relative to the tile, the traffic over it, and whether the tile is in a wet area. In a wet area, a debonded tile is a leak path, and a leak path under a stone floor is expensive to find and fix.
Check for movement by standing on the tile and watching the joints. A tile that moves even slightly under load will crack, and the crack will appear at the weakest point, which is usually the corner nearest the hollow.
What causes it
Most debonding comes from one of four sources: an uneven substrate, adhesive that was not combed and collapsed properly, a tile that was not back-buttered, or moisture. The moisture route deserves attention, because a floor that is debonding because of moisture will keep debonding after a repair.
Test the substrate moisture before any repair. The methods are covered in concrete moisture testing, and the short version is that a slab that is still releasing moisture will attack the adhesive from below, no matter how good the replacement is.
Adhesive coverage is the other common cause. Lifting a loose tile shows the truth: a tile with adhesive only at the corners and a clean centre was never bedded. That is a technique problem, and it will be repeated on the next tile unless the method changes.
Repair options
Injection is the least invasive option for a hollow that is small and where the tile is sound. Holes are drilled at the perimeter of the hollow, a low-viscosity resin is injected until it appears at the next hole, and the tile is weighted while the resin cures. It works on stone and on porcelain, and it avoids removing the tile.
Replacement is the reliable option for a tile with a large hollow, a cracked tile, or a hollow in a wet area. Cut the grout, break the tile from the centre, clean the bed to sound adhesive, and re-fix with full coverage. The risk is damage to adjacent tiles, which is why the cut is made in the grout rather than through the tile.
Where a whole floor is hollow, the problem is the installation rather than individual tiles, and the only real fix is to remove and re-lay. Patching a systematically bad floor is a sequence of small failures.
Drilling and cutting for repair
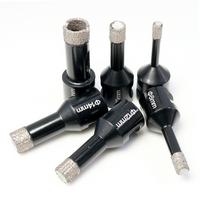
Injection holes are small, typically 3 to 6 mm, and should be drilled through the tile and into the void without penetrating the substrate. Depth control matters: a bit that breaks into the substrate gives the resin an escape route, so the void never fills properly, and it can puncture a waterproofing layer. Lifting the tile is a separate risk, caused by too much resin or too much injection pressure, which is why the tile is weighted while the resin cures.
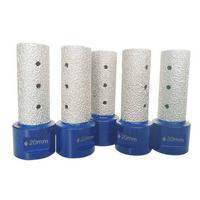
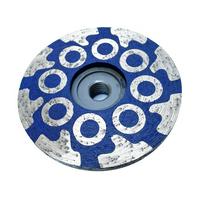
A diamond core bit gives a clean hole with a controlled depth, and a depth stop on the drill prevents the bit from running away. For a tile that has to come out, a diamond cup wheel on a grinder is not the right tool; the cut is made in the grout with a thin blade, then the tile is broken out.
After any repair, re-check flatness across the repaired area. A tile that is re-set slightly high will create a lip, and the method for checking is in floor flatness and lippage checks.
Safety
Breaking out a tile produces sharp fragments and dust. Wear safety glasses, gloves, and a dust mask, and protect the surrounding floor. Injection resins are hazardous before curing; wear gloves and eye protection, ventilate the area, and read the safety data sheet. Use residual current protection for any wet tool.