
 ES
Marble etches. A lemon, a glass of wine, a splash of vinegar, a cleaner with the wrong pH: any of them will dissolve the calcite at the surface and leave a dull, slightly rough mark that does not clean off.
The important thing to understand is that an etch is not a stain sitting on the stone. It is a shallow depression where material used to be. Cleaning will not fix it; only re-polishing will, and the repair has to remove enough material to get below the damaged layer without creating a visible dip.
Etch, stain, or scratch
The three look similar on a quick inspection and need different treatments.
- Etch. Dull, lighter in colour, with a slightly rough or chalky feel. The boundary is irregular and often matches the shape of a spill or a glass base.
- Stain. Darker, and the surface texture is unchanged. Oil, rust, and organic matter are the usual causes.
- Scratch. A line, with a direction. Catches a fingernail if deep.
A water drop test helps. Water beads on a polished, sealed surface and spreads on an etched one. If the water spreads and darkens the area immediately, the surface is open and the damage is more than cosmetic.
The repair sequence
A light etch, where the surface is dull but not depressed, can be restored with a polishing powder or a fine diamond pad. A heavier etch that has removed visible material needs a grit sequence, starting coarse enough to flatten the depression.
The sequence follows the same logic as any polish: each grit removes the previous grit's scratches, and the direction of work alternates so progress is visible. Work wet, keep the area small at first, and widen as the grits get finer.
The trap is over-working. A 100 mm patch that is polished five times will end up lower than the surrounding floor, and the dip shows under raking light even when the sheen matches. Work the minimum area and check flatness with a straight edge as the repair progresses.
On a vertical surface, gravity works against the process: water and slurry run down, the pad dries at the top of the stroke, and the repair becomes uneven. Work in small sections and keep re-wetting. On a horizontal surface, the risk is pooling, which dilutes the abrasive and slows the cut.
Honing versus polishing
Not every marble floor is meant to be polished. A honed floor has a matte finish, and the repair has to restore that finish rather than a mirror. Polishing a honed floor creates a glossy patch that is far more visible than the etch was.
Match the finish before starting. The difference between honed and polished is not just the last grit but the whole approach, and the distinction is set out in honed vs polished marble. On a honed floor, the repair usually stops at a fine diamond pad and a powder, without the final gloss step.
Tools for the job
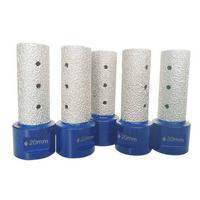
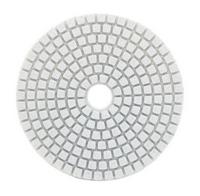
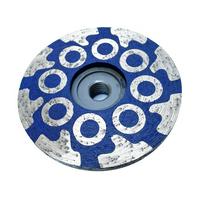
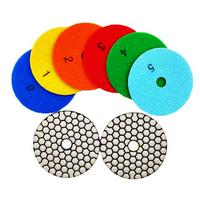
A variable-speed wet polisher is the right machine. A fixed-speed grinder runs too fast for polishing powders and overheats the surface. For the diamond stage, a dry diamond polishing pad can be used wet with care, but a wet-rated pad holds up better under continuous water. For the final stage, a 3-step hybrid polishing pad reduces the number of steps and is less sensitive to operator technique.
On a large etch, a small area of a floor, or a worktop edge, the choice of backer matters as much as the pad. A rigid backer keeps the repair flat; a soft one follows the dip and polishes the depression without removing it.
Stopping it recurring
Repair without protection is a repeat job. Marble in a kitchen or a bathroom needs a sealer that resists acids, or a finish that is more tolerant of them. An impregnating sealer reduces the porosity but does not make marble acid-proof; a topical coating offers more resistance but changes the appearance and needs maintenance.
Practical measures matter more than products. Coasters under glasses, a mat at the sink, prompt wiping of spills, and a pH-neutral cleaner rather than a generic bathroom product. Most etch damage in domestic work comes from cleaning products, not from accidents.
Where the stone is a worktop, consider a honed finish. A honed surface shows etching less than a polished one because the sheen is already diffuse. That is a design decision worth making before installation rather than after the third repair.
Safety
Polishing powders are usually acidic or strongly alkaline, and both are hazardous. Wear gloves and safety glasses, ventilate the area, and read the safety data sheet before use. The general approach to these products is covered in safety data sheets for stone processing additives. Use residual current protection with a wet polisher, and keep the cable out of the slurry.