
 ES
Grout haze is a thin film of cement or polymer left on the tile face after grouting. On a matte surface it looks like dust. On a polished surface it looks like a smear that will not buff out, and on a dark polished stone it is the first thing anyone notices.
The window for easy removal is short. Within an hour or two, haze lifts with water and a sponge. After a day, it has cured into the surface and needs a different approach.
Preventing it
Most haze is created during grouting, not after. Three habits prevent it.
- Seal porous stone before grouting. A stone that has been sealed resists the grout film, and the haze lifts cleanly.
- Do not over-wet the sponge. A wet sponge dilutes the grout and spreads it across the face. Wring it out so it is damp, not dripping.
- Change the water often. Dirty water deposits a film as surely as grout does.
Work in small areas and clean as you go. A grout job that is cleaned in one pass at the end will always leave more haze than one cleaned in sections.
Removing fresh haze
Fresh haze comes off with a damp sponge and a light touch. Use a clean bucket, change the water frequently, and rinse the sponge thoroughly. Do not scrub; scrubbing drives the grout into the surface texture.
On a textured or honed surface, a soft brush is more effective than a sponge because it reaches into the pits. Work in circles, keep the surface wet, and wipe with a clean cloth afterwards.
Dry the surface and inspect it under raking light before it is considered finished. Haze that is invisible from above shows clearly at a low angle, and the client will see it at exactly that angle.
Removing cured haze
Once cured, cement haze needs a mild acid or a proprietary haze remover. This is where polished surfaces are at risk: acid attacks the polish on marble and limestone, and the cure becomes worse than the problem.
For cement-based grout on porcelain or ceramic, a diluted acid cleaner is acceptable if it is used carefully and rinsed thoroughly. For natural stone, especially marble, use a pH-neutral or a specifically stone-safe product, and test on an offcut first.
For polymer-modified grout, an acid may not touch the film. A solvent-based remover or a mechanical method is often needed, and a mechanical method on a polished surface means a very fine abrasive, applied evenly.
When the surface needs re-polishing
A polished surface that has been dulled by haze removal, or by an acid that was too strong, has to be re-polished. The work is local but it has to blend, and the sequence is the same as for a scratch repair.
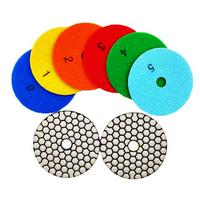
Work the affected area with a fine pad, keep it wet, and widen the area as the grits get finer. A patch that is polished without blending will show as a bright spot under a window. The matching standard is described in gloss units on polished stone.
On a honed surface, the repair stops earlier. Over-polishing a honed floor to fix a haze mark leaves a gloss patch that is more obvious than the haze was, and the distinction between the two finishes matters here, as set out in honed vs polished marble.
Textured and brushed surfaces
A brushed or antique finish is the hardest to clean because the texture holds residue. A stiff brush, plenty of water, and patience are the tools. A pressure washer can help on an exterior surface but will erode a soft stone if it is aimed too close.
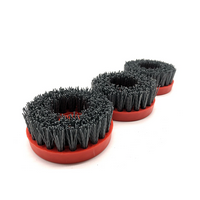
For a brushed surface, a diamond masonry grinding brush is the tool that produces the texture in the first place, and it can also be used to refresh a surface that has been clogged. Used lightly and evenly, it restores the brushed pattern rather than removing it.
Avoiding the second problem
Aggressive haze removal often creates a new defect. A scrub pad on a polished surface leaves a dull patch. A strong acid on marble leaves an etch. A wire brush on a soft stone leaves scratches.
The rule is to match the method to the surface. On polished stone, use the least aggressive method that works, test in an inconspicuous area, and stop as soon as the haze is gone. A surface that is slightly hazy but intact is easier to live with than a surface that is clean but dull.
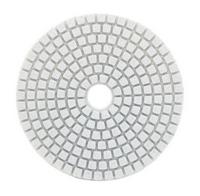
For polishing after cleaning, a 3-step hybrid polishing pad covers the sequence with fewer steps and less risk of over-working a small area.
Safety
Acid cleaners are hazardous. Wear gloves and safety glasses, ventilate the area, and never mix them with bleach or with other cleaners. Read the safety data sheet, which is the same discipline described in safety data sheets for stone processing additives. Use residual current protection if a wet polisher is used, and keep the cable clear of the water.