
 ES
Flatness disputes usually start after the polishing is done, when raking light makes every ridge visible. Agreeing how the floor will be measured before grinding begins is the simplest way to avoid them.
Flatness, levelness, and lippage are different things
Flatness describes local deviation from a plane; levelness describes whether that plane is horizontal. A floor can be flat but sloped, or level but wavy. Lippage is the height difference between adjacent slab edges at a joint or between tiles. Each needs a different measurement and a different remedy.
Grinding removes high points. It does not fill low ones, so a slab with a significant dish or a settled joint may need a repair mortar before any tooling is chosen. Expecting a grinder to level a structural defect leads to excessive stock removal at the highs and an exposed aggregate pattern that no polishing sequence will hide.
How it is measured
- Straightedge and feeler gauge. Simple, repeatable, and well suited to checking lippage at a specific joint. Record the gauge length and the tolerance.
- Continuous profilometry or F-numbers. Used on large pours where a statistical description of the surface is required. It characterises the whole floor rather than selected spots.
- Laser level or optical level grid. Useful for tracking overall levelness and for deciding where patching is needed.
- Raking light. Not a measurement, but a fast way to find where to place the instruments.
Mark before grinding
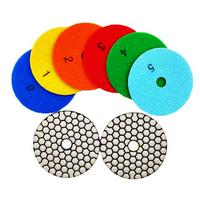
Walk the floor with a straightedge, mark the high and low areas, and photograph them with a scale in frame. This gives the operator a removal plan and gives both parties a baseline if the specification is later questioned. Re-measure after the coarse metal-bond stage, before switching to resin, while correction is still possible. The metal bond to resin bond transition is the practical deadline for major corrections.
Documenting the baseline
Photograph the marked floor with the straightedge in place and a readable scale in frame, and keep a simple grid plan with each measurement point numbered. That record matters when a dispute turns on whether a deviation was present before grinding or created by it.
Agree the gauge length and tolerance in writing as well. A two-metre straightedge and a three-metre one will give different verdicts on the same slab, and neither result is wrong. Clarify whether the specification applies to the whole floor or only to defined traffic paths, because edge zones around columns and walls are usually treated separately.
Finally, re-measure after the coarse stage and mark any remaining highs. Correction is cheap while metal-bond tooling is on the machine and expensive once the resin stages have begun.
What the tooling can do
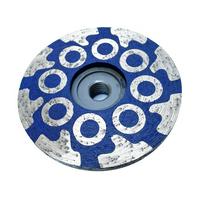
An arrow-segment grinding disc takes down high spots aggressively on a lighter machine, while diamond floor grinding blocks give more even removal across a planetary head. Terrazzo and decorative floors need a gentler approach, covered in the terrazzo restoration guide. The surface profile guide links the required profile to the preparation stage.
Browse the grinding tools category for tooling by machine type. Keep dust control running on every pass, wear eye protection and hearing protection, and isolate the machine before changing discs.