
 ES
Polished concrete problems usually appear late. The floor looks good after the last resin step, then dries, then shows a scratch pattern under raking light that was invisible when it was wet. Most of those scratches were created in the transition from metal bond to resin bond and never removed.
Why the transition is different
Metal bond tools cut deeply and leave a coarse, directional scratch. Resin bond tools cut shallowly and refine that scratch. The gap between the two is the largest in the whole sequence, and it is the one operators try to close too quickly.
Resin tools cannot remove a deep metal-bond scratch efficiently. They polish the peaks and leave the valleys, which is why a floor can feel smooth and still show a pattern.
Step spacing
A workable sequence moves in roughly doubling grit steps through the metal stages, then tightens up as it moves into resin. Jumping from a coarse metal scratch straight to a fine resin pad is the single most common cause of a visible pattern.
The practical rule: after each step, the previous scratch should be gone completely, checked under raking light on a dry area. If you can still see the direction of the last cut, the next step is not ready to start.
Hybrid tooling and the in-between step
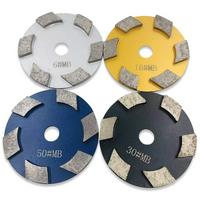
Hybrid or transitional tools — copper or hybrid bond discs with intermediate diamond concentration — exist to bridge the gap. They cut faster than resin and finish finer than metal, which shortens the sequence without skipping it.
On a hard, dense floor, a hybrid step is often what makes the transition practical. On a soft, porous floor, the same hybrid tool can over-polish the surface and close it before the resin stages, which then struggle to bite.
Wet or dry at the transition
Dry grinding with extraction is standard for polishing because the slurry from wet work hides scratches and complicates cleanup. The transition is also where heat becomes a problem: resin tools run dry at speed can soften and smear, leaving a haze that looks like a scratch pattern but is not.
If the surface starts to look cloudy rather than scratched, reduce speed and pressure before adding another step. More grit will not fix a heat haze.
Checking the surface
- Raking light: a low-angle light shows scratches that diffuse light hides.
- Dry inspection: wet surfaces mask the pattern. Let the area dry before judging.
- Two directions: inspect across and along the pass direction.
- Sample square: keep a small test area and take it through the full sequence before committing the floor.
Where the transition goes wrong
Three failures account for most callbacks. Skipping a step to save time. Using a worn resin pad that no longer cuts and only burnishes. And running the metal stage too fine, so the resin stage has nothing left to refine but still cannot close the surface.
The last one is subtle: a very fine metal finish looks good and tempts the operator to jump straight to a high resin grit. The result is a floor with a shallow but persistent pattern that only appears after the surface dries.
Tooling
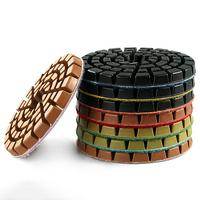
Start from the grinding disc category. A resin bond sanding disc is the usual first resin step, and a floor polishing pad carries the sequence through the finer stages.
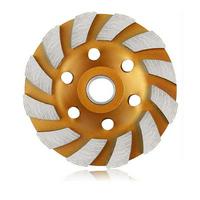
Two related reads: resin bond discs for concrete floors, and resin filled versus metal bond cup wheels.
Safety
Dust extraction, a respirator, eye and hearing protection, and gloves are the baseline. Keep the machine's shroud sealed against the floor — a gap at the shroud is where most of the dust escapes. Disconnect power before changing tooling, and never reach under a machine that is still spinning down.
If you are building a polishing sequence for a specific slab, send the hardness and target gloss and we will confirm the transition steps.