
 ES
Core drilling accuracy is decided before the bit touches concrete. A stand that is not rigid, not square to the surface, or not held down properly will produce a hole that is oversized, out of line, or elliptical — and no amount of operator skill recovers it.
Vacuum base, anchor base, or both
A vacuum base is fast and leaves no holes to patch. It relies on a seal between the base pad and the surface, which means it needs a smooth, non-porous, clean floor. Broom-finished concrete, cracked slabs, and tile joints all leak air.
An anchor base is slower to set but does not depend on surface texture. It is the right choice on rough concrete, on vertical walls, and anywhere the rig will run for hours.
Many crews use both: anchor the base and run the vacuum as a backup. On a vertical wall, that combination is close to standard practice, because a vacuum pad that loses seal on a wall drops the rig.
Preparing the surface
Vacuum bases need a clean, flat area at least as large as the pad. Sweep, then wipe, then check with a straight edge. A small piece of grit under the gasket is enough to break the seal.
On a textured floor, a thin bead of sealant around the pad can close the leaks. It is a temporary measure, not a substitute for an anchor, and it should be removed afterwards.
Watch the vacuum gauge throughout the job, not just at setup. A gauge that drifts is telling you the seal is failing, and the drill will start to walk before it fails completely.
Anchor placement
Anchor holes have to avoid rebar, post-tensioning, and embedded services. Scan before drilling, and place anchors at least a bit diameter away from any located bar. In post-tensioned slabs, anchor placement is a structural decision — confirm it with the engineer.
Use the shortest anchors that give adequate hold. Deep anchors increase the chance of hitting reinforcement and take longer to patch.
Alignment
Plumb the mast in two directions, not one. A mast that is plumb front-to-back and leaning sideways produces a hole that is straight but off-axis, which is harder to detect than a visibly leaning hole.
Check square between the bit and the surface at the entry point. On a wall, a small engineer's square or a digital angle finder is faster and more reliable than eye.
Confirm the rig cannot rotate. The torque reaction from a core bit is significant, and a stand that is only held by friction will swing when the bit binds.
Water containment
Most core rigs use a water containment ring or a shroud with a vacuum connection. Seal the ring to the surface before starting, and check that the drain or vacuum is working. Water running down a wall into a finished floor is a common and avoidable call-back.
Common setup mistakes
- Relying on vacuum alone on a rough or porous surface.
- Anchoring into a patch or a spalled area that cannot hold a fixing.
- Checking plumb in one plane only.
- Not tightening the mast clamp, so the head creeps during the cut.
- Leaving the water ring unsealed and flooding the area.
Tooling
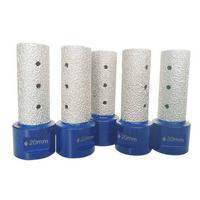
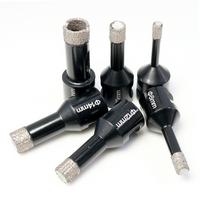
For the drilling itself, start from the diamond drill bit category. A vacuum brazed core bit covers general diameters, and a turbo segment dry core bit is the usual choice where water is not practical.
Two related reads: drilling speed and pressure, and water cooling for core drilling.
Safety
A core rig stores energy in its mast and in the bit. Keep hands clear of the barrel and the water ring, wear eye protection and hearing protection, and never adjust a stand while the motor is running. Use RCD protection for wet work, and secure the rig against rotation before starting the motor.
If you are setting up a coring program and need a stand and bit combination for your surface and diameter, send the details and we will confirm.