
 ES
Most bathroom cutting jobs are small: a hole for a mixer, a notch around a pipe, a trimmed tile at the shower edge. The consequences are disproportionate, because a slip can pierce a waterproof membrane or a pipe that is hidden a few centimetres behind the tile, in a room where access is tight and the finish is already complete.
Find out what is behind the tile first
Use the plans, the positions of visible fittings, and a suitable detector to build a picture of pipe and cable routes before marking anything. Where an older property has no reliable drawings, assume nothing and choose fixing positions that avoid the zones above and below visible outlets. Mark the hole on a removable tape layer rather than directly on the glaze.
Remember the membrane. A core bit does not stop at the tile; it keeps going into the adhesive, the board, and whatever is behind it. Use a depth stop or a collar where possible, and pull back as soon as the tile is through. The water cooling guide for core drilling explains how to keep the bit cool without saturating the wall build-up.
Cutting and drilling setup
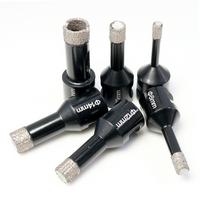
- Diamond hole saw for round holes. Start at an angle to establish a track, then bring the tool upright once the rim has bitten.
- Low, steady feed. Forcing the bit on a brittle glaze is the usual cause of a star crack around the hole.
- Continuous rim blade for straight cuts. Segment strikes chip a polished tile edge; support both sides of the line.
- Contain the water. A shroud and a wet vacuum keep the room usable and protect adjacent finishes.
- Check the reverse side on any loose tile before fixing, since a clean face can hide breakout at the back.
Where the cut is an inside edge around a sink or a recess, the undermount sink cutout guide covers the refinement of curved internal edges.
Sequencing in a finished room
Protect the bath, tray, and drain before any cutting. Slurry and tile fragments are abrasive and can scratch a finished surface as easily as a dropped tool. Do all cutting outside the room if the pieces can be measured and brought in, and keep a spare tile from the same batch for the piece most likely to break.
Sealing what you opened
Every fixing hole through a tiled wet area is a potential route for water to reach the substrate. Use a suitable sealant or collar around the penetration, and check that the membrane detail is reinstated where the design requires it. This step belongs in the job sheet, because it is easy to overlook once the fitting is in place and the visible cut looks clean.
Tooling and safe practice
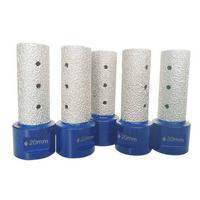
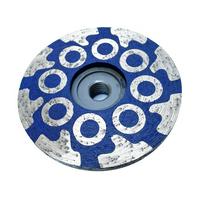
Browse the tile tools category for small-format blades and bits. A tile-specific cutting blade handles straight trims, and a diamond core bit for tile is the right tool for fixing holes.
Wear eye protection, gloves, hearing protection, and a respirator rated for the exposure, keep the guard fitted, and use an RCD-protected supply for wet work. Confirm the accessory's rated rpm and isolate the tool before changing a bit or blade.